Manage Value lists
View Value Lists
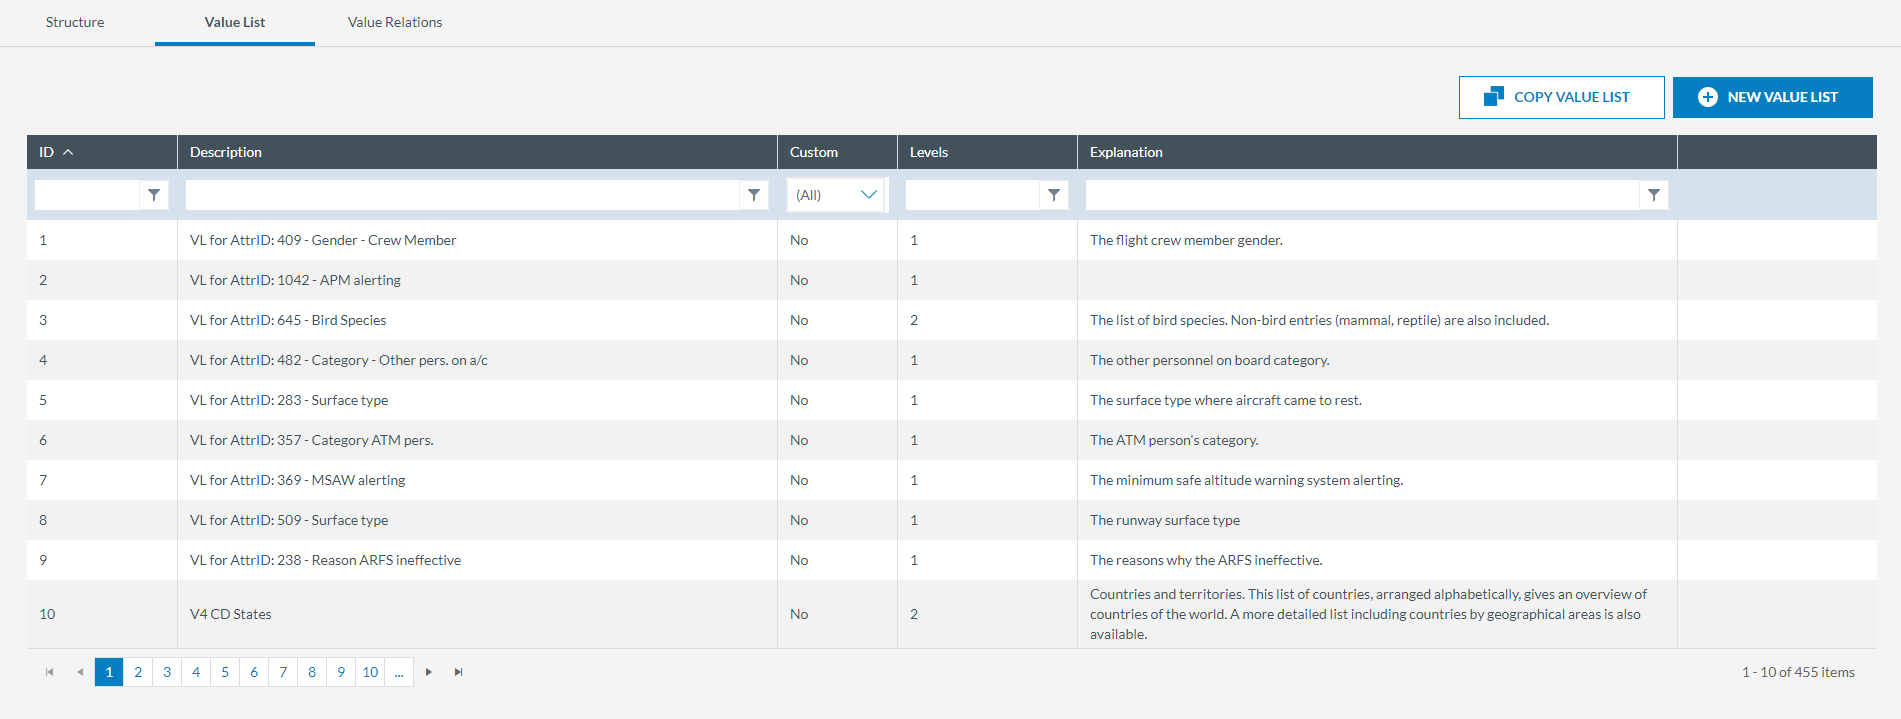
To view the available Value Lists in a Taxonomy project, go to the 'Value List' tab located at the top of the page.
Create a Value list
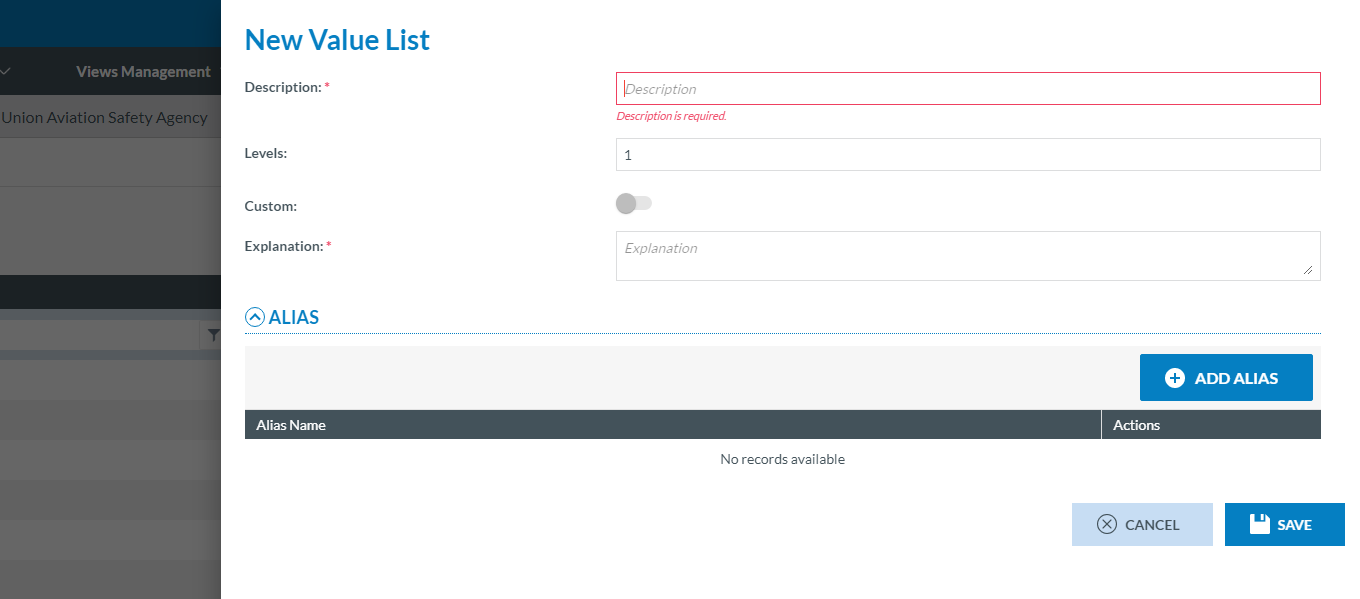
To create a new Value List in a Taxonomy project, press the 'New Value List' button and a window to create a new Value List will be opened.
Provide the information required and click 'Save'.
You can associate an Alias to the new Value List. Click on 'Add Alias' button and select one or more Aliases to associate to the Value List.
Create a Value List from an existing Value List
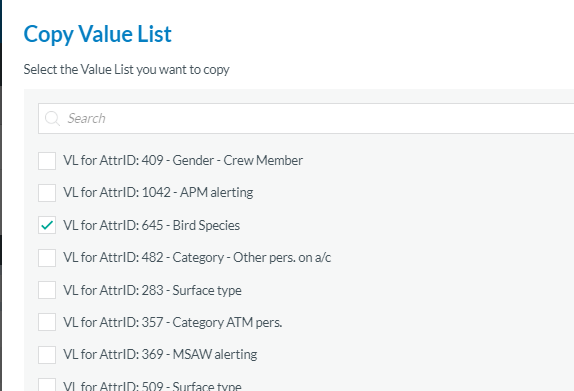
Click on ‘Copy Value List’ button at the top-right side of the list of Value Lists.
In the modal displayed select the Value List to be copied and click on the 'Save' button.
A new line is included at the top of the list of Value List with the same properties of the copied Value List but with a new ID and the string ‘COPY’ added as prefix of the Description.
Change the Description of the new Vale List and click on the 'Save' button
Edit Value List properties
To edit the the Value List properties, click on the '3 dots' icon button of the Value List and press the 'Set Value List Properties' option.
The same restrictions as when creating a new Value List will be applied here upon saving the changes.
Change the desired information and click on the 'Save' button

Delete a Value List
To delete a Value List, select the Value List you want to delete in the Value List table. Press the 'trash' button and a window confirming the deletion of the Value List will open.
Take into account that this action has no rollback, hence the window asking for a confirmation of the deletion.
Add Values to a Value List
From the list of Value Lists, select the '3 dots' icon over the Value List entry where the new Value will be added. In the submenu that opens, press the 'Edit Value List' option.
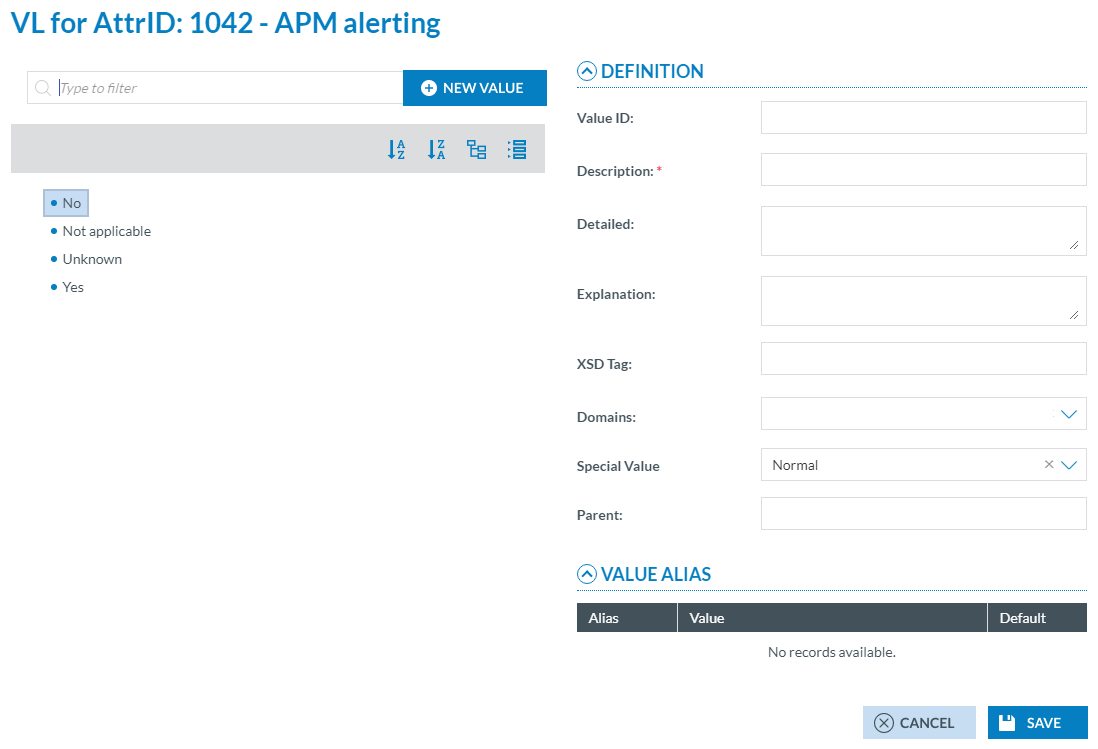
A window is displayed with two sections:
-
Left section: showing the values, if any, contained in the selected Value List
-
Rigth section: entry dialog to add/edit a Value in the Value List
Click on the ‘New Value’ button at the top of the Values tree. The fields of the right will become editable after this.
The Value ID is completed by the system automaticaly but you can also edit it if necessary.
You can add values to the Alias(es) if the Value List have associated aliases.
After completing the required fields, press the 'Save' button and the new Value will appear in the Value tree at the left of this window.
Edit values in a Value List
From the list of Value Lists, select the '3 dots' icon over the Value List entry where the Value will be edited. In the submenu that opens, press the 'Edit Value List' option.
A window is displayed with two sections:
-
Left section: showing the values, if any, contained in the selected Value List
-
Rigth section: entry dialog to edit the value in the Value List
Select the Value to be edited in the left section of the panel. The information of that Value will be displayed on the right section. Edit the desired information and click on the 'Save' button.
To change the order of the value you must 'Drag and Drop' the value to the new position and click on the 'Save' button
Delete values in a Value List
From the list of Value Lists, select the '3 dots' icon over the Value List entry where the value will be deleted. In the submenu that opens, press the 'Edit Value List' option.
A window is displayed with two sections:
-
Left section: showing the values contained in the selected Value List
-
Rigth section: entry dialog to edit the value in the Value List
Select the Value to be deleted in the left section of the panel and click on the 'Trash' icon. The value will be shown in 'grey' to indicate that it has been deleted. The deletion of the Value can be reversed by click the 'Restore' icon.
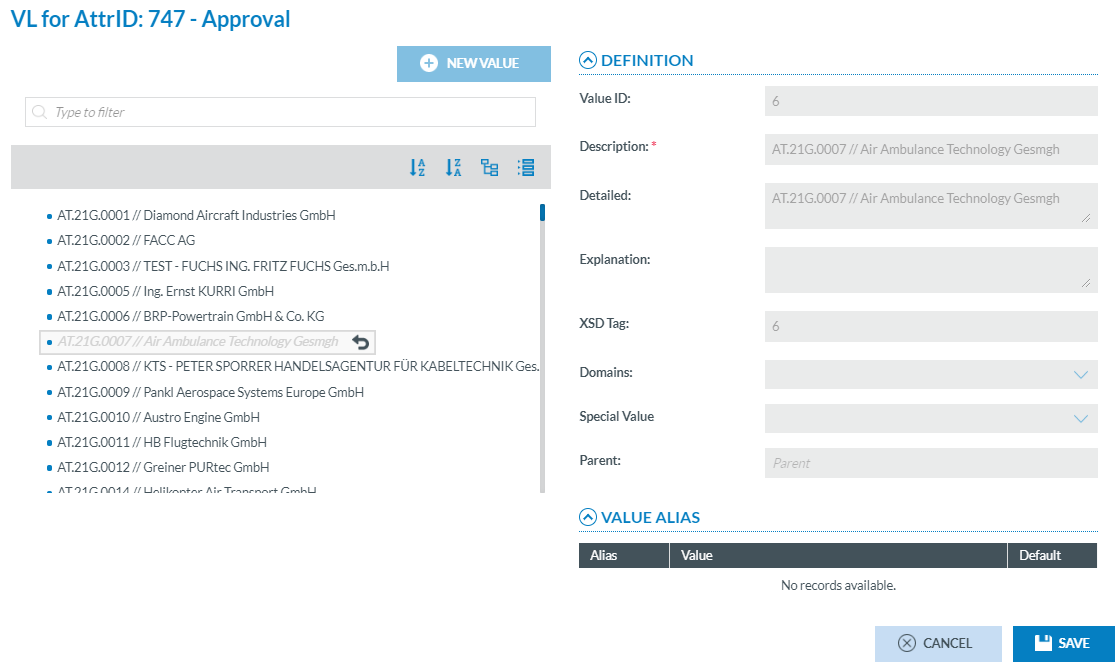
To change the order of the Value you must 'Drag and Drop' the value to the new position and click on the 'Save' button.